How Often Should You Clean an Automatic Litter Box?

About the Author
Quick answer: Check an automatic litter box every day or as part of a routine, empty the waste area before it overfills, clean approved removable waste components on the model's schedule and deep-clean the chamber or litter area periodically. The exact frequency depends on the model, number of cats, litter, stool consistency, room conditions and actual residue. The current AutoScooper 12 guide recommends waste-container emptying about every five days with seven days as a stated maximum, bin washing every 15 days and a full chamber-and-bin clean monthly. Those AutoScooper 12 intervals are model-specific. They are not a universal schedule and should not be copied to AutoScooper 11 or another brand without its current manual. Maintenance layer Typical trigger What to inspect or clean Why it matters Routine check Daily or during normal care Litter level, unprocessed waste, residue, alerts, cat-use changes Finds small problems before the next cycle Waste service Before full, after odor or alert Liner, waste container, seating and visible sensor area Prevents overflow and container odor Litter refresh Low level, contamination or poor clumps Top up or replace as the guide allows Supports clean separation Component wash Model schedule or visible residue Approved removable bin, chamber or litter bed Removes films that emptying leaves behind Sensor-area care Dust, liner or repeated interruption Visible owner-accessible sensing areas Supports normal detection without bypassing safety Deep clean Model schedule, odor or sticky residue All approved removable litter-contact parts Resets accumulated residue Automatic does not mean maintenance-free A self-cleaning litter box automates waste separation. It does not wash the surfaces, replace litter, dry components or inspect the cat's output. Owners still need to notice: broken clumps; damp litter; stool or urine changes; a waste liner across a sensor; litter above or below the fill range; residue on the chamber; a waste area that smells before it appears full; an incomplete or interrupted cycle. The advantage is a shift from repeated scooping to shorter checks and scheduled cleaning. Skipping those checks can make a small litter or liner problem look like a machine failure. The daily or routine check A routine check should take less time than a full cleaning. Look at the litter bed after normal use and confirm that the machine returned to its expected position. Check: Is the litter between the documented fill lines? Did the last cycle remove the clump or stool? Is litter stuck to a wall, screen or approved liner? Is the waste area nearing full? Is an indicator or sound unusual? Is the cat using the box with normal posture and frequency? Do not wait for odor to be the first sign of a full container or failed clump. Automatic cleaning reduces scooping; it does not eliminate routine inspection or deep cleaning. How often to empty the waste container Emptying frequency depends on usable container volume and the amount of material deposited. Cat count is important, but cat size, diet, stool consistency, litter weight and broken clumps also change how quickly the container fills. Empty earlier when: more cats use the unit; the liner is difficult to close; loose litter collects around waste; odor appears; the fill or alert indicator activates; the container no longer seats cleanly; warm or humid conditions accelerate odor. Never compress an overfilled liner inside a machine. Remove and close it according to the guide. Inspect the track and container before installing a new liner. How often to wash the waste bin Replacing a liner does not remove every residue. Dust, small clump fragments and moisture can remain on the container and retainer area. Wash only parts the model guide identifies as washable. A periodic bin wash should include: complete waste removal; inspection of corners, ring and contact surfaces; gentle cleaning with the approved method; thorough rinsing when permitted; complete air drying; inspection before reassembly. Do not reinstall a damp bin. Moisture can create odor, affect litter and reach areas not designed for water. How often to deep-clean the chamber The chamber or litter bed needs a deeper clean when residue accumulates even if the waste container is emptied regularly. A model may specify a monthly interval, but actual conditions can require earlier attention. Deep-clean sooner when: urine reaches the bottom or side; soft stool smears on a surface; odor remains after the waste bin is serviced; litter dust forms a film; clumps repeatedly stick; a spill occurs; the unit was stored dirty; an approved washable part was reinstalled before fully dry. Do not use a universal deep-clean procedure. Rotating chambers, rake systems and different sensor arrangements require different disassembly and washing steps. AutoScooper 12 maintenance schedule The current PetPivot AutoScooper user guide publishes this schedule for AutoScooper 12: Every 5–7 days: empty the waste container, with the guide recommending about five days and a maximum of seven subject to actual conditions. Every 15 days: wash the waste container. Once a month: empty the litter and clean the litter chamber and waste container. The guide also instructs users to unplug before cleaning or servicing, remove the chamber and litter bed as shown, wash approved parts and air-dry the chamber completely with its opening facing up. Do not publish these intervals as AutoScooper 11 instructions until its current approved manual confirms them. A safe cleaning sequence Keep the cat in another area and provide a clean backup litter box. Stop operation and unplug as the guide instructs. Remove the waste liner and litter without spilling into the base. Disassemble only owner-removable parts shown in the manual. Dry-brush loose litter before adding water. Wash only approved parts with the approved method. Keep the electrical base, plug, adapter, controls and protected sensor components dry. Air-dry every washed component completely. Reassemble in the documented order. Add compatible litter to the fill range and use any required leveling or calibration control. Run one supervised manual test while the cat is safely away. Never force a chamber, use a power washer or immerse the base. Do not spray liquid into the base or bypass safety sensors during cleaning. What to use, and what to avoid Follow the manufacturer before choosing a cleaner. In general, use a soft brush, nonabrasive cloth and the cleaning product or mild method the manual allows. Avoid: bleach or disinfectant unless the manufacturer explicitly approves the dilution and rinse; strong perfume that leaves a residue; abrasive pads that scratch plastic; oil-based products; spraying liquid into sensors or controls; mixing cleaning chemicals; reassembly while damp. For a cat with a contagious disease or parasite, ask the veterinarian for a disinfection protocol that is also compatible with the machine. Sensor care without bypassing safety Visible sensor areas can collect dust or be blocked by a liner edge. Clean only the owner-accessible area and use the method in the guide. A dry soft cloth may be appropriate where the manual permits it. Do not: cover a sensor to make a cycle continue; scrape a lens; insert tools into a protected opening; apply liquid directly; open the electrical base; assume an alert is only dirt. If an alert remains after normal cleaning and assembly, use the PetPivot AutoScooper troubleshooting guide or contact support. Adjust the schedule for multiple cats More cats usually mean faster waste accumulation and more traffic, but do not calculate maintenance from cat count alone. Observe the real container level, clump quality and odor. For a multi-cat household: perform routine checks more often; empty before the busiest period causes overflow; keep a backup litter location available during cleaning; track which cat uses the unit; watch for social blocking; do not assume one automatic unit replaces every resource. An automatic cycle can clean after visits, but the waste area still has a finite capacity. Litter choice affects cleaning frequency Weak clumps break and spread damp material. Excessive dust coats surfaces. Oversized particles can move poorly through a screen. Litter above the fill line can spill into tracks or the waste path. Use the model's compatible litter and maintain the documented level. If cleaning frequency suddenly increases after a litter change, test compatibility before assuming the machine has deteriorated. For selection criteria, use the best litter for automatic litter boxes guide. Signs the schedule is too long Shorten the interval when you see: odor before the planned service day; visible residue after cycles; sticky or broken clumps; damp surfaces; flies or pests; repeated alerts; litter tracking from contaminated particles; the cat hesitating, edge balancing or refusing the box. A calendar is a starting point. The condition of the litter area and the cat's behavior decide whether it is working. PetPivot cleaning references Review AutoScooper 11 product details and AutoScooper 12 Lite product details separately. Use the current manual for the exact model and obtain updated instructions from support when the website and packaged guide differ. AutoScooper 11 AutoScooper 12 Lite Official PetPivot product images. Confirm the current product page and model guide before publication. For liners, pads and approved replacement components, visit PetPivot AutoScooper accessories. Frequently Asked Questions Do I need to clean every day if the box self-cleans? You need a brief routine check, not a daily deep clean. Confirm litter level, cycle results, waste capacity, residue, alerts and changes in the cat's use. Why is the waste drawer filling faster than usual? A faster fill rate can come from more use or from material that should have remained in the litter bed. More cats, larger cats or a diet and stool change. Broken clumps carrying extra clean litter into the drawer. Incompatible litter, poor clumping or excessive litter depth. A liner or drawer shape that reduces usable capacity. Should I replace all the litter during every deep clean? Follow the exact model guide. Remove contaminated, saturated or incompatible litter, but do not assume every machine uses the same full-replacement schedule. Can I reassemble washed parts if they feel only slightly damp? No. Air-dry every approved washable part completely before reassembly. Moisture can create odor, affect clumping and reach areas that are not designed to be wet. What should I do if odor returns before the scheduled clean? Treat the schedule as a maximum, not a reason to wait. Empty the waste area and inspect the liner, rim and surrounding floor. Check for broken clumps, saturated litter or residue in the chamber. Wash only approved removable parts and dry them completely. If odor or interrupted cycles return quickly, review litter compatibility and use the model-specific troubleshooting path. Sources and Evidence Notes PetPivot AutoScooper User Guide - Current AutoScooper 12 setup, litter, transition, maintenance, indicators and operating limits. PetPivot AutoScooper 11 product page - Official product page and original product image. PetPivot AutoScooper 12 Lite product page - Official product page and original product image.
Quick answer: Check an automatic litter box every day or as part of a routine, empty the waste area before it overfills, clean approved removable waste components on the model's schedule and deep-clean the chamber or litter area periodically. The exact frequency depends on the model, number of cats, litter, stool consistency, room conditions and actual residue. The current AutoScooper 12 guide recommends waste-container emptying about every five days with seven days as a stated maximum, bin washing every 15 days and a full chamber-and-bin clean monthly.
Those AutoScooper 12 intervals are model-specific. They are not a universal schedule and should not be copied to AutoScooper 11 or another brand without its current manual.
|
Maintenance layer |
Typical trigger |
What to inspect or clean |
Why it matters |
|
Routine check |
Daily or during normal care |
Litter level, unprocessed waste, residue, alerts, cat-use changes |
Finds small problems before the next cycle |
|
Waste service |
Before full, after odor or alert |
Liner, waste container, seating and visible sensor area |
Prevents overflow and container odor |
|
Litter refresh |
Low level, contamination or poor clumps |
Top up or replace as the guide allows |
Supports clean separation |
|
Component wash |
Model schedule or visible residue |
Approved removable bin, chamber or litter bed |
Removes films that emptying leaves behind |
|
Sensor-area care |
Dust, liner or repeated interruption |
Visible owner-accessible sensing areas |
Supports normal detection without bypassing safety |
|
Deep clean |
Model schedule, odor or sticky residue |
All approved removable litter-contact parts |
Resets accumulated residue |
Automatic does not mean maintenance-free
A self-cleaning litter box automates waste separation. It does not wash the surfaces, replace litter, dry components or inspect the cat's output. Owners still need to notice:
- broken clumps;
- damp litter;
- stool or urine changes;
- a waste liner across a sensor;
- litter above or below the fill range;
- residue on the chamber;
- a waste area that smells before it appears full;
- an incomplete or interrupted cycle.
The advantage is a shift from repeated scooping to shorter checks and scheduled cleaning. Skipping those checks can make a small litter or liner problem look like a machine failure.
The daily or routine check
A routine check should take less time than a full cleaning. Look at the litter bed after normal use and confirm that the machine returned to its expected position.
Check:
- Is the litter between the documented fill lines?
- Did the last cycle remove the clump or stool?
- Is litter stuck to a wall, screen or approved liner?
- Is the waste area nearing full?
- Is an indicator or sound unusual?
- Is the cat using the box with normal posture and frequency?
Do not wait for odor to be the first sign of a full container or failed clump.

Automatic cleaning reduces scooping; it does not eliminate routine inspection or deep cleaning.
How often to empty the waste container
Emptying frequency depends on usable container volume and the amount of material deposited. Cat count is important, but cat size, diet, stool consistency, litter weight and broken clumps also change how quickly the container fills.
Empty earlier when:
- more cats use the unit;
- the liner is difficult to close;
- loose litter collects around waste;
- odor appears;
- the fill or alert indicator activates;
- the container no longer seats cleanly;
- warm or humid conditions accelerate odor.
Never compress an overfilled liner inside a machine. Remove and close it according to the guide. Inspect the track and container before installing a new liner.
How often to wash the waste bin
Replacing a liner does not remove every residue. Dust, small clump fragments and moisture can remain on the container and retainer area. Wash only parts the model guide identifies as washable.
A periodic bin wash should include:
- complete waste removal;
- inspection of corners, ring and contact surfaces;
- gentle cleaning with the approved method;
- thorough rinsing when permitted;
- complete air drying;
- inspection before reassembly.
Do not reinstall a damp bin. Moisture can create odor, affect litter and reach areas not designed for water.
How often to deep-clean the chamber
The chamber or litter bed needs a deeper clean when residue accumulates even if the waste container is emptied regularly. A model may specify a monthly interval, but actual conditions can require earlier attention.
Deep-clean sooner when:
- urine reaches the bottom or side;
- soft stool smears on a surface;
- odor remains after the waste bin is serviced;
- litter dust forms a film;
- clumps repeatedly stick;
- a spill occurs;
- the unit was stored dirty;
- an approved washable part was reinstalled before fully dry.
Do not use a universal deep-clean procedure. Rotating chambers, rake systems and different sensor arrangements require different disassembly and washing steps.
AutoScooper 12 maintenance schedule
The current PetPivot AutoScooper user guide publishes this schedule for AutoScooper 12:
- Every 5–7 days: empty the waste container, with the guide recommending about five days and a maximum of seven subject to actual conditions.
- Every 15 days: wash the waste container.
- Once a month: empty the litter and clean the litter chamber and waste container.
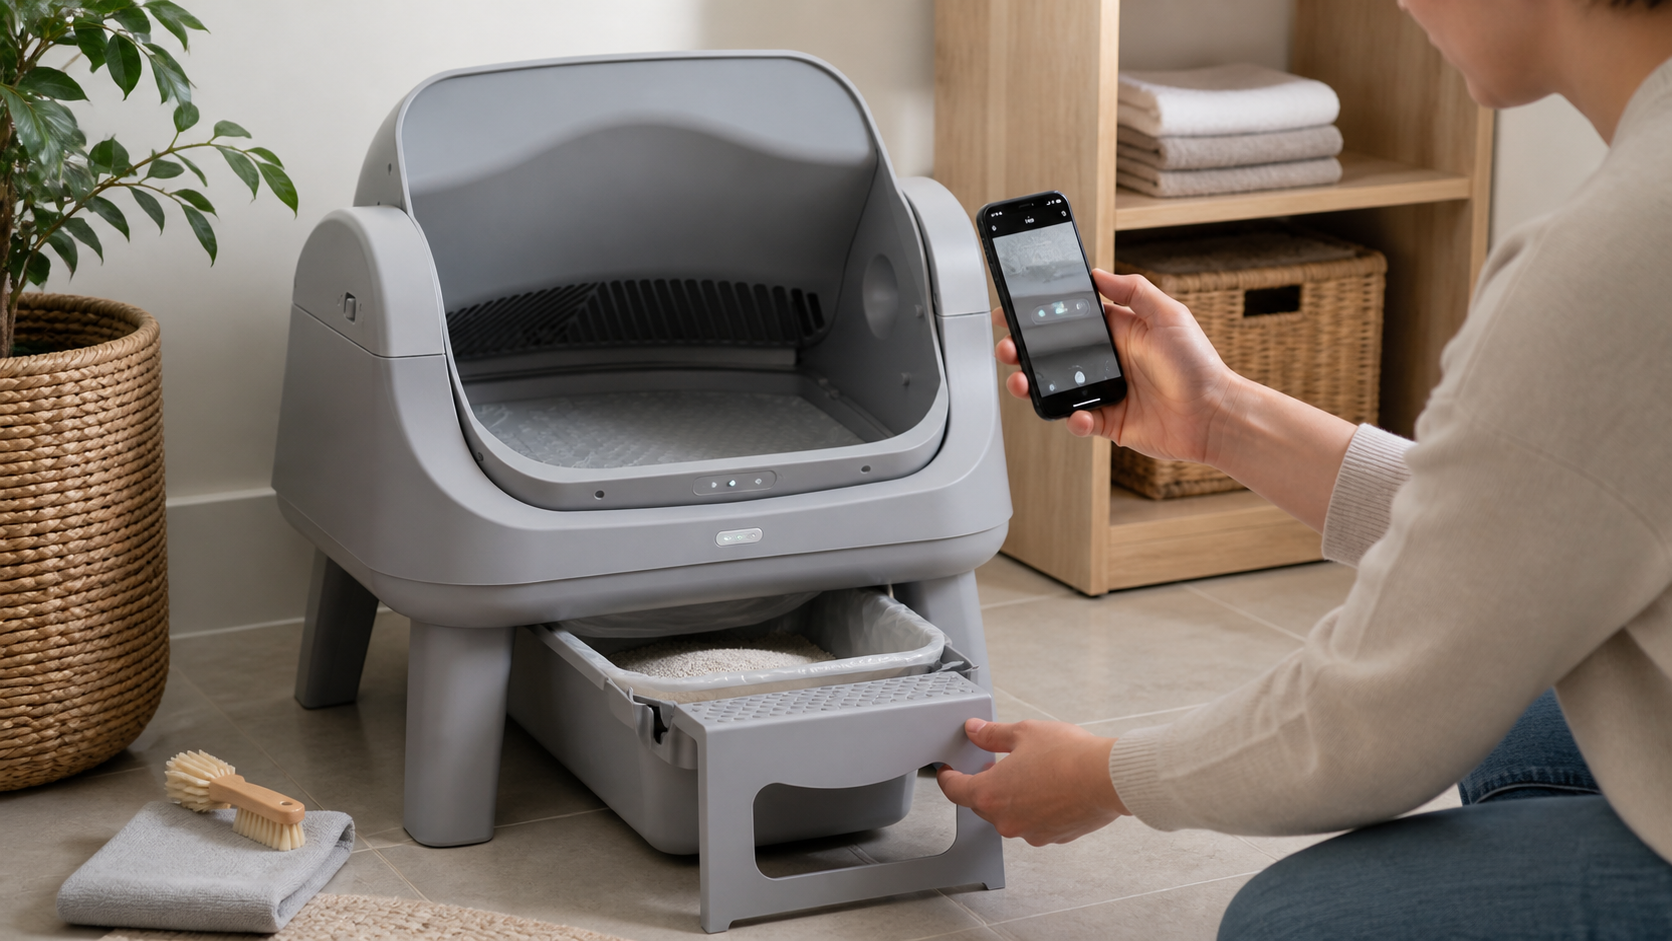
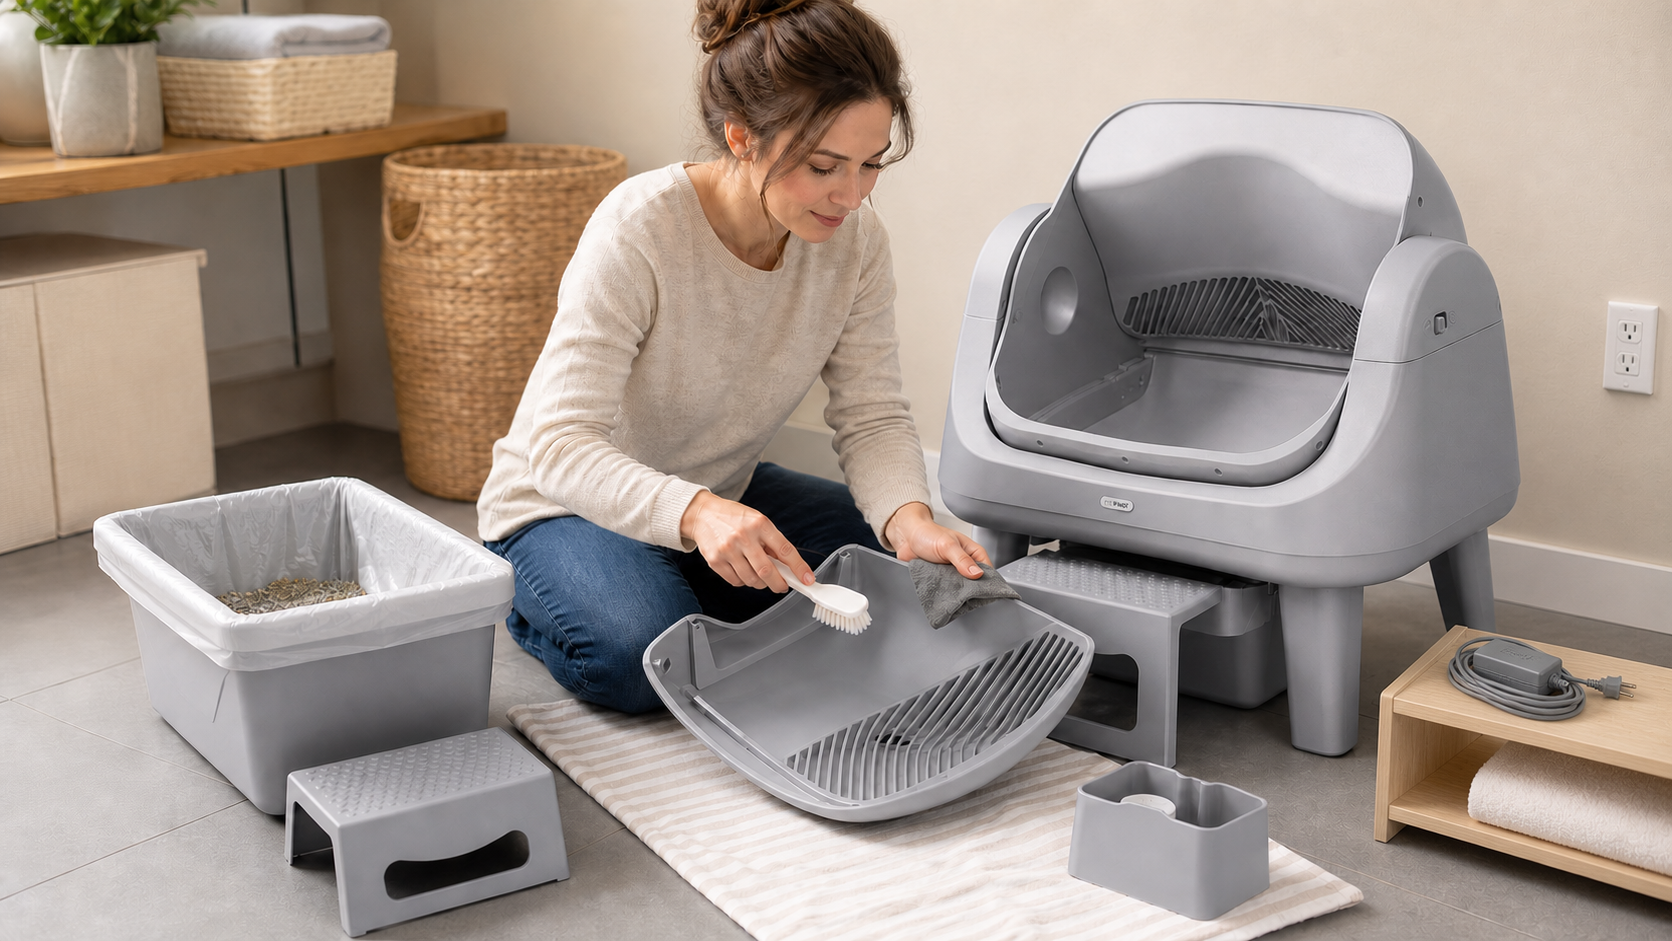
The guide also instructs users to unplug before cleaning or servicing, remove the chamber and litter bed as shown, wash approved parts and air-dry the chamber completely with its opening facing up.
Do not publish these intervals as AutoScooper 11 instructions until its current approved manual confirms them.
A safe cleaning sequence
- Keep the cat in another area and provide a clean backup litter box.
- Stop operation and unplug as the guide instructs.
- Remove the waste liner and litter without spilling into the base.
- Disassemble only owner-removable parts shown in the manual.
- Dry-brush loose litter before adding water.
- Wash only approved parts with the approved method.
- Keep the electrical base, plug, adapter, controls and protected sensor components dry.
- Air-dry every washed component completely.
- Reassemble in the documented order.
- Add compatible litter to the fill range and use any required leveling or calibration control.
- Run one supervised manual test while the cat is safely away.
Never force a chamber, use a power washer or immerse the base.

Do not spray liquid into the base or bypass safety sensors during cleaning.
What to use, and what to avoid
Follow the manufacturer before choosing a cleaner. In general, use a soft brush, nonabrasive cloth and the cleaning product or mild method the manual allows.
Avoid:
- bleach or disinfectant unless the manufacturer explicitly approves the dilution and rinse;
- strong perfume that leaves a residue;
- abrasive pads that scratch plastic;
- oil-based products;
- spraying liquid into sensors or controls;
- mixing cleaning chemicals;
- reassembly while damp.
For a cat with a contagious disease or parasite, ask the veterinarian for a disinfection protocol that is also compatible with the machine.
Sensor care without bypassing safety
Visible sensor areas can collect dust or be blocked by a liner edge. Clean only the owner-accessible area and use the method in the guide. A dry soft cloth may be appropriate where the manual permits it.
Do not:
- cover a sensor to make a cycle continue;
- scrape a lens;
- insert tools into a protected opening;
- apply liquid directly;
- open the electrical base;
- assume an alert is only dirt.
If an alert remains after normal cleaning and assembly, use the PetPivot AutoScooper troubleshooting guide or contact support.
Adjust the schedule for multiple cats
More cats usually mean faster waste accumulation and more traffic, but do not calculate maintenance from cat count alone. Observe the real container level, clump quality and odor.
For a multi-cat household:
- perform routine checks more often;
- empty before the busiest period causes overflow;
- keep a backup litter location available during cleaning;
- track which cat uses the unit;
- watch for social blocking;
- do not assume one automatic unit replaces every resource.
An automatic cycle can clean after visits, but the waste area still has a finite capacity.
Litter choice affects cleaning frequency
Weak clumps break and spread damp material. Excessive dust coats surfaces. Oversized particles can move poorly through a screen. Litter above the fill line can spill into tracks or the waste path.
Use the model's compatible litter and maintain the documented level. If cleaning frequency suddenly increases after a litter change, test compatibility before assuming the machine has deteriorated.
For selection criteria, use the best litter for automatic litter boxes guide.
Signs the schedule is too long
Shorten the interval when you see:
- odor before the planned service day;
- visible residue after cycles;
- sticky or broken clumps;
- damp surfaces;
- flies or pests;
- repeated alerts;
- litter tracking from contaminated particles;
- the cat hesitating, edge balancing or refusing the box.
A calendar is a starting point. The condition of the litter area and the cat's behavior decide whether it is working.
PetPivot cleaning references
Review AutoScooper 11 product details and AutoScooper 12 Lite product details separately. Use the current manual for the exact model and obtain updated instructions from support when the website and packaged guide differ.
|
|
|


Official PetPivot product images. Confirm the current product page and model guide before publication.
For liners, pads and approved replacement components, visit PetPivot AutoScooper accessories.
Frequently Asked Questions
Do I need to clean every day if the box self-cleans?
You need a brief routine check, not a daily deep clean. Confirm litter level, cycle results, waste capacity, residue, alerts and changes in the cat's use.
Why is the waste drawer filling faster than usual?
A faster fill rate can come from more use or from material that should have remained in the litter bed.
- More cats, larger cats or a diet and stool change.
- Broken clumps carrying extra clean litter into the drawer.
- Incompatible litter, poor clumping or excessive litter depth.
- A liner or drawer shape that reduces usable capacity.
Should I replace all the litter during every deep clean?
Follow the exact model guide. Remove contaminated, saturated or incompatible litter, but do not assume every machine uses the same full-replacement schedule.
Can I reassemble washed parts if they feel only slightly damp?
No. Air-dry every approved washable part completely before reassembly. Moisture can create odor, affect clumping and reach areas that are not designed to be wet.
What should I do if odor returns before the scheduled clean?
Treat the schedule as a maximum, not a reason to wait.
- Empty the waste area and inspect the liner, rim and surrounding floor.
- Check for broken clumps, saturated litter or residue in the chamber.
- Wash only approved removable parts and dry them completely.
- If odor or interrupted cycles return quickly, review litter compatibility and use the model-specific troubleshooting path.
Sources and Evidence Notes
- PetPivot AutoScooper User Guide - Current AutoScooper 12 setup, litter, transition, maintenance, indicators and operating limits.
- PetPivot AutoScooper 11 product page - Official product page and original product image.
- PetPivot AutoScooper 12 Lite product page - Official product page and original product image.
You may also like

AutoScooper 12 Lite Cat Litter Box

AutoScooper 12 litter Bed – 2 Pack

AutoScooper 12 Waste Bags – 60 Count


Further reading
How Often Should You Clean an Automatic Litter Box?
How to Transition Your Cat to an Automatic Litter Box Without Stress
Cat Won't Use an Automatic Litter Box? Use This Recovery Plan